


Recently, I had the opportunity to work on an integration project connecting my company’s system with a third-party telecommunications service provider. The project revolved around building an integration gateway that bridged our internal infrastructure with the REST APIs offered by the vendor.
My first task was to review the vendor’s API documentation and set up a Postman environment that could be shared with the team for testing various API calls during development. I configured multiple environments, added variables for data handling, and ensured ease of use. Postman was my go-to tool because of its convenience and familiarity. However, challenges arose when I needed to share it with five other team members, as a paid license was required—a cost my company wasn’t willing to cover. Eventually, the team size was reduced, and I managed to share my Postman configuration.
This challenge, however, motivated me to search for alternatives to the well-known orange mascot. My requirements within the company were straightforward:
- Support for sharing configurations with multiple team members.
- Preferably free to use.
- Support for managing environments and environment variables.
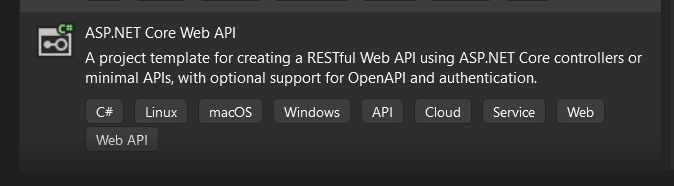
My search led me to discover .http files, a feature introduced in Visual Studio 2022 (version 17.8) and included by default in the templates of API projects built with .NET 9!
This built-in tool enables you to configure and send HTTP requests directly from Visual Studio, view responses without relying on external tools, and manage multiple environments and variables—all while being version-controlled as part of your project.
In this article, I’ll guide you through how to use and configure these .http files effectively.
Prerequisites
Visual Studio 2022, version 17.8 or later.
Creating a .http file
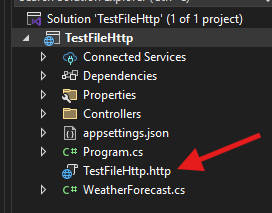
If your project doesn’t already include a .http file, you can easily add one and organize it according to your needs. For the purpose of this article, I created a new ASP.NET Core Web API project.
By default, Visual Studio includes a .http file in the newly created project, ready for you to use.
.http file syntax
Let’s start with the basics. A .http file can contain one or more HTTP requests. The general syntax for a request is the following:
### Comment
HTTPMethod URL HTTPVersion
Header1: Value1
Header2: Value2

Request body (optional)- HTTPMethod: The HTTP method to use, such as
OPTIONS,GET,HEAD,POST,PUT,PATCH,DELETE,TRACE, orCONNECT. - URL: The endpoint to which the request will be sent.
- HTTPVersion: (Optional) The HTTP version to use, such as
HTTP/1.1,HTTP/2, orHTTP/3. - Headers: (Optional) Additional HTTP headers for the request, allowing you to include metadata or specify content types.
- Request Body: (Optional) The payload to send with the request, typically required for methods like
POSTorPUT.
Creating your first request
Let’s create a GET request using the default WeatherForecastController to call one of its endpoints:
GET http://localhost:5249/weatherforecast/
Accept: application/json
Above the GET request, you’ll see two buttons: Send Request and Debug.
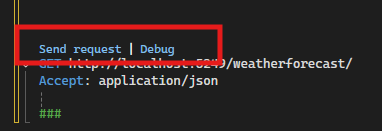
Clicking Send Request displays a panel on the right with details of the request and its response (note: the project must be running for this), while Debug launches the project in Debug configuration.
POST request with payload
Here’s an example of a POST request:
### Api call to change city
POST http://localhost:5249/cities/change
Content-Type: application/json
{
    "CityCode": "Rome"
}
Using variables
Variables can be defined within .http files to reuse common values. For example:
@baseAddress = http://localhost:5249
@city = "Rome"

### Api call to change city
POST {{baseAddress}}/cities/change
Content-Type: application/json

{
    "CityCode": "{{city}}"
}
Variables are defined using @variableName = value and referenced with {{variableName}}.
Managing environments
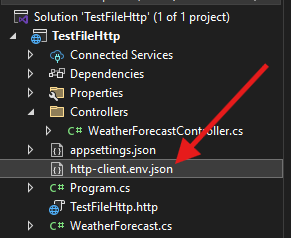
In my case, I needed three configurations: development, test, and production. To manage these environments, you can create a file named http-client.env.json in the same directory as the .http file. If it’s not found there, Visual Studio will search parent directories up to the project root.
Here’s an example http-client.env.json file:
{
  "development": {
    "baseUrl": "https://localhost:5001"
  },
  "test": {
    "baseUrl": "https://api-test.com"
  },
  "production": {
    "baseUrl": "https://api.com"
  }
}
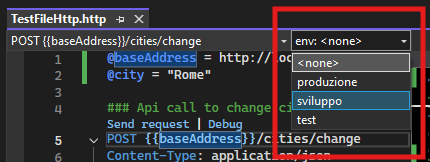
In Visual Studio, you can select the desired environment via a dropdown menu in the .http editor, located at the top-right corner.
Update your .http file to reference the environment variable:
@city = Rome

### Api call to change city
POST {{baseUrlAddress}}/weatherforecast/cities/change
Content-Type: application/json

{
    "CityCode": "{{city}}"
}
Shared environment variables
You can also define shared variables in http-client.env.json. For example:
As you can see, it is possible to execute an override of the variable, such as in “production” configuration in row 13.
{
  "$shared": {
    "changeCityEndpoint": "/weatherforecast/cities/change"
  },
  "development": {
    "baseUrlAddress": "https://localhost:7100"
  },
  "test": {
    "baseUrlAddress": "https://api-test.com"
  },
  "production": {
    "baseUrlAddress": "https://api.com",
    "changeCityEndpoint": "/api/weatherforecast/cities/change"
  }
}@city = Rome
### Api call to change city
POST {{baseUrlAddress}}{{changeCityEndpoint}}
Content-Type: application/json
{
"CityCode": "{{city}}"
}Private environment variables
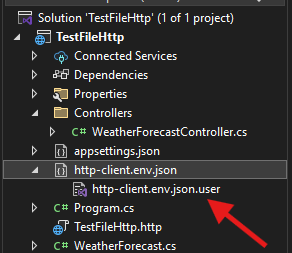
If you need private configurations that shouldn’t be shared, you can create a .user file (e.g., http-client.env.json.user). These files are automatically excluded from version control.
Let’s create a file called http-client.env.json.user (in the same directory where you saved the file http-client.env.json), Visual Studio will show it inside the environment file.
Here’s an example:
{
  "sviluppo": {
    "baseUrlAddress": "https://localhost:5000"
  }
}
Conclusions
In this article, we explored how to test REST APIs directly from Visual Studio using .http files and their associated environment files. This approach offers key advantages, such as eliminating the need for external tools and enabling version-controlled configuration files as part of your project.
I hope you found this guide helpful! For further details, feel free to check out Microsoft’s official documentation on the topic.
Thank you for reading, and see you in the next article!